Vertical Axis Wind Turbines (VAWTs) are becoming a fascinating and increasingly viable option for generating clean energy, especially in bustling urban landscapes. But just like any significant investment, maximizing their potential hinges on understanding the nuances of VAWT Installation, Maintenance, and Safety. This isn't just about bolting a turbine to a roof; it's about smart planning, diligent care, and prioritizing safety at every turn to ensure your turbine delivers reliable performance for decades to come.
At a Glance: Key Takeaways for Your VAWT Journey
- VAWTs excel in turbulent urban winds, offering a quieter, more compact solution than traditional turbines.
- Proper site assessment is crucial: Measure wind speeds (9-11 mph average needed) and get a professional structural assessment of your roof.
- Safety is non-negotiable during installation and maintenance; always use fall protection and consult licensed electricians.
- Regular, proactive maintenance—monthly visual checks, semi-annual blade cleaning, and annual professional servicing—can extend your VAWT's lifespan from 15-20 years to 25-30 years.
- Data logging helps you monitor performance, identify issues early, and maximize energy output.
- Understand local regulations and HOA rules before you even think about buying a turbine.
Why Vertical? Understanding Your VAWT's Unique Edge
Imagine a wind turbine that doesn't need to spin to face the wind, works efficiently even when the breeze is a bit chaotic, and produces a gentle hum rather than a roaring turbine sound. That's the beauty of a Vertical Axis Wind Turbine. Unlike their Horizontal Axis (HAWT) cousins, VAWTs operate around a vertical shaft, capturing wind from any direction. This makes them exceptionally well-suited for urban environments where buildings create turbulent wind patterns.
While they might be slightly less efficient than HAWTs in consistently high wind speeds, VAWTs shine in lower, more unpredictable wind conditions. Their typical lifespan ranges from 15 to 20 years, a figure that can stretch to an impressive 25-30 years with diligent maintenance. Plus, with sound levels usually between 35-50 decibels (think a quiet refrigerator), they're less noticeable than many other energy solutions. Ready to dive deeper into how these fascinating machines work? You can explore vertical axis wind power to understand the mechanics and different designs in more detail.
However, it's worth noting that extreme temperatures can affect performance: cold weather increases air density, reducing efficiency, while hot temperatures can cause material expansion and decreased air density. Understanding these characteristics is your first step toward a successful VAWT journey.
Before You Build: The Critical Pre-Installation Checklist
Before you invest in any hardware, a thorough pre-installation assessment is paramount. Think of this as laying the groundwork for your turbine's entire operational life. Skipping these steps can lead to costly errors, safety hazards, and disappointing performance.
The Wind is Your Fuel: Assessing Your Site
A wind turbine, by definition, needs wind. And not just any wind, but consistent, strong enough wind to justify the investment.
- Measure, Don't Guess: The single most crucial step is to install an anemometer—a wind speed measuring device—at the proposed turbine location. Let it gather data for at least 6 to 12 months. This extended period accounts for seasonal variations, giving you an accurate average wind speed.
- Meet the Minimums: Most VAWTs require an average wind speed of 9-11 mph (4-5 m/s) to operate efficiently and provide a worthwhile energy return. Without this, your turbine might just be an expensive ornament.
Is Your Roof Ready? Structural Integrity Matters
Rooftop VAWTs, though compact, are not feather-light. They weigh anywhere from 100 to 500 pounds, and that's before accounting for the dynamic forces of wind and vibration.
- Professional Assessment is Non-Negotiable: Have a qualified structural engineer inspect your roof. They'll assess its age, current condition, and most importantly, its load-bearing capacity. You need to be certain your roof can handle the VAWT's static weight plus the added stress from vibrations and high winds. Flat roofs are often ideal for VAWT installation, provided they can support the weight and vibrations effectively.
Navigating the Red Tape: Permits and Regulations
Installing a wind turbine is typically not a "ask for forgiveness, not permission" situation. Local regulations are almost always involved.
- Call Your Local Authorities: Contact your local planning department or zoning office early in the process. You'll need to understand height restrictions, noise regulations (though VAWTs are generally quiet), setback requirements from property lines, and exactly which permits are necessary.
- Don't Forget the HOA: If you live in a community governed by a Homeowners' Association, check their rules. Many HOAs have specific guidelines or outright prohibitions regarding external structures like wind turbines.
Choosing Your Turbine and Powering Up: Equipment Essentials
Once you've confirmed your site is suitable and you've navigated the regulatory landscape, it's time for the exciting part: selecting your VAWT and gathering the necessary components.
Matching Turbine to Your Needs
VAWTs come in various designs, such as Savonius (cup-shaped blades) and Darrieus (curved blades), each with unique characteristics.
- Consider Your Environment: Think about your average wind speed, the available space on your roof, your specific power requirements, and acceptable noise levels.
- Key Specifications to Review:
- Rated Power Output: How much electricity can it generate?
- Cut-in Speed: The minimum wind speed required for the turbine to start producing power.
- Efficiency: How effectively does it convert wind energy into electricity?
- Size and Weight: Must fit your space and be manageable for your roof's structural capacity.
- Materials: Look for durable materials like fiberglass or carbon fiber for longevity.
- Safety Features: Automatic braking systems are critical for high winds.
- Warranties and Reviews: A good warranty and positive customer feedback offer peace of mind.
Gathering Your Toolkit
Safety and proper installation demand the right gear.
- Safety First: Essential safety gear includes a full-body harness with anchor points, non-slip work boots, a hard hat, safety glasses, and durable gloves. Never compromise on safety.
- Mounting and Electrical: You'll need a robust mounting kit specific to your VAWT and roof type, weatherproof electrical wiring (appropriately gauged), and an inverter to convert DC power from the turbine into usable AC power for your home.
- Basic Tools: Wrenches, screwdrivers, an electric drill, a sturdy ladder, a level, and a multimeter for electrical checks are all essential.
Connecting the Dots: Electrical Components
This is where your VAWT integrates with your home's power system. Accuracy and safety are paramount.
- The Power Core: You'll need the turbine's generator/alternator itself, a charge controller (to regulate voltage and prevent battery overcharging), and deep-cycle batteries if you plan for energy storage.
- System Integration: An inverter is crucial for converting the DC power from the turbine (and batteries, if used) into AC power compatible with your home's grid.
- Safety and Connection: Acquire appropriate cables and connectors, fuses for circuit protection, a weatherproof junction box, a disconnect switch (for maintenance and emergencies), and a power meter to track your output.
- Professional Electrical Work: Always ensure all electrical components are rated for outdoor use. More importantly, consult and hire a licensed electrician for all electrical connections to your home's panel. This ensures compliance with local codes and, most importantly, your safety.
The Ascent: A Step-by-Step Guide to VAWT Installation (with Safety First)
With planning complete and equipment ready, it's time for installation. This phase requires meticulous attention to detail and an unwavering commitment to safety.
Safety Above All Else
Working on a roof with heavy equipment and electricity is inherently risky. Never take shortcuts.
- Roof Integrity Check: Re-confirm that your roof has been professionally assessed as sturdy and capable of supporting the VAWT's weight and vibrations.
- Fall Protection is Mandatory: Always use personal fall protection. This includes a safety harness securely attached to independent anchor points, and consider temporary guardrails if feasible. Never, under any circumstances, work alone on a roof.
- Electrical Hazard Awareness: Before touching any wiring, turn off the main power to your home. Use only insulated tools, and as reiterated, all high-voltage electrical connections must be handled by a licensed electrician.
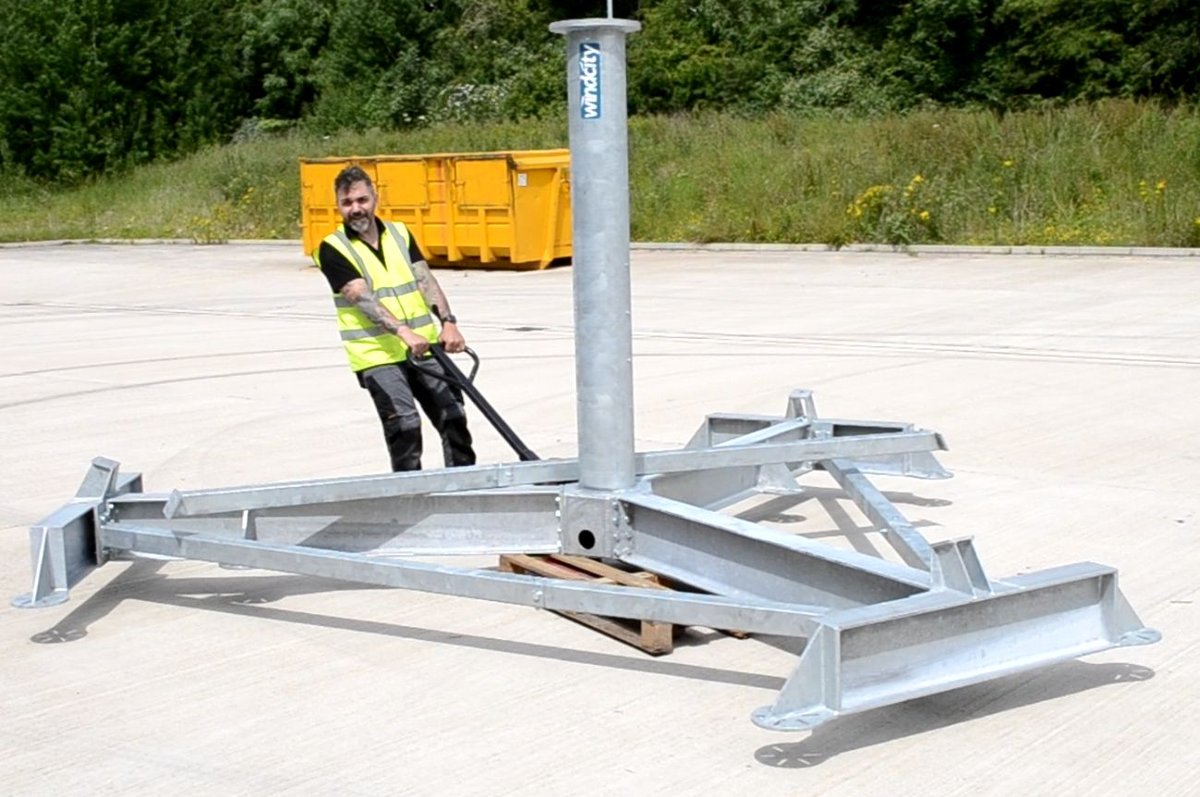
Mounting the Foundation
A stable base is the bedrock of your VAWT's performance.
- Optimal Placement: Carefully evaluate the roof to identify the spot with the most unobstructed wind flow, farthest from potential wind-blocking structures.
- Tools and Materials Ready: Ensure all your tools and the mounting kit are organized and easily accessible.
- Secure the Base: Following the manufacturer's instructions, securely attach the mounting base to your roof structure. This typically involves drilling into rafters or structural supports. Use appropriate lag bolts or through-bolts.
- Level and Seal: Use a level to ensure the mounting base is perfectly horizontal. Apply high-quality, weatherproof sealant around all drilled holes and base edges to prevent water intrusion.
Assembling and Attaching the Turbine
This is often the most physically demanding part, requiring careful coordination.
- Turbine Assembly (Ground Level): If possible, assemble the VAWT's main body, blades, and rotor assembly on the ground. This is safer and easier.
- Lift and Secure: Carefully lift the assembled turbine (using appropriate lifting equipment or sufficient manpower) onto the mounted base. Securely attach it using the manufacturer's specified bolts and fasteners. Ensure all connections are tightened to the recommended torque specifications.
Wiring It Right: Connecting to Your Home's Grid
This stage connects your new power source to your home.
- Controller and Inverter Placement: Install the charge controller and inverter in a protected, easily accessible area, typically indoors or in a weatherproof enclosure.
- Turbine to Controller: Connect the VAWT's electrical output to the charge controller using weatherproof wiring, routing it safely through your roof and walls according to local electrical codes.
- System to Electrical Panel: The licensed electrician will then connect the charge controller (and battery bank, if applicable) to the inverter, and the inverter to your home's main electrical panel. This ensures the generated AC power flows safely into your home or the grid.
Final Checks and First Spin
The moment of truth!
- Thorough Inspection: Before powering anything on, conduct a comprehensive visual inspection. Check all bolts, connections, wiring, and seals. Ensure no tools or debris are left on the roof.
- System Test: With power restored (by the electrician), carefully test the system according to the manufacturer's guidelines. Monitor initial power output and listen for any unusual noises.
Keeping the Blades Turning: Comprehensive VAWT Maintenance for Longevity
Installation is just the beginning. The true measure of a reliable VAWT is consistent, proactive maintenance. This not only ensures optimal performance but also significantly extends the turbine's lifespan, potentially taking it from 15-20 years to 25-30 years.
Your Monthly Routine: Visual Inspections
Think of this as your turbine's regular health check. It takes minimal time but can catch small issues before they become big problems.
- What to Look For: From ground level (using binoculars for higher components), visually inspect the blades for any cracks, chips, or debris. Check the rotor assembly for wobbles or unusual movement. Inspect all visible electrical connections for corrosion or looseness, the tower structure and foundation for cracks or shifting, and the brake system for any obvious damage.
- Log Everything: Keep a detailed log of your observations, noting dates and any actions taken. This helps track changes over time.
The Heart of the Turbine: Bearing Care
Bearings are crucial for smooth, efficient operation. Neglecting them leads to increased friction, noise, and eventual failure.
- Regular Lubrication: Apply the correct type and amount of lubricant as specified by your VAWT's manual. Clean bearings thoroughly before application to prevent contaminants from mixing with new grease. Use a grease gun for even distribution.
- Monitor for Issues: Pay close attention to any changes in bearing temperature or noise levels. Increased heat or unusual grinding/whining sounds are immediate red flags.
- Scheduled Replacement: Bearings typically need replacement every 3-5 years or after 20,000-30,000 operating hours, whichever comes first. If you detect increased noise, vibration, or heat, replace them immediately. Always use high-quality, load-rated, and sealed components, ensuring proper cleaning and lubrication of new bearings during installation.
Blade Beauty and Durability: Cleaning and Polishing
Clean blades aren't just for aesthetics; they're vital for aerodynamic efficiency.
- Frequency: Clean and polish blades at least twice yearly, or more frequently if you live in a particularly dusty or polluted area.
- Safe Cleaning: Always shut down and secure the turbine before cleaning. Use a soft-bristled brush or sponge with mild, non-abrasive soap and water. Rinse thoroughly to remove all soap residue.
- Protection: After cleaning, apply a specialized wind turbine blade polish to protect the surface and maintain aerodynamic performance.
- Inspect for Damage: While cleaning, thoroughly inspect the blades for any wear, hairline cracks, or other damage. Never use harsh chemicals or abrasive materials, which can degrade blade integrity.
Tightening Up: Ensuring Structural Integrity and Connections
Vibrations and environmental stresses can loosen components over time, leading to reduced efficiency and potential hazards.
- Regular Inspection and Torque: Periodically inspect and tighten all connections. This includes bolts in the rotor assembly (where blades attach to the shaft, and shaft bearings), generator mounting bolts, electrical connections, and the entire support structure (foundation bolts, guy wire tensioners if applicable). Use a torque wrench to ensure proper tension according to manufacturer specifications.
- Advanced Structural Assessment: For the main shaft, bearings, and support structures, consider specialized tools like ultrasonic thickness gauges and vibration analyzers to detect thinning or imbalances. Non-destructive testing (NDT) methods, such as dye penetrant or magnetic particle inspection, can identify fatigue cracks. Focus NDT efforts on critical areas like blade roots, hub connections, and main shaft bearings, utilizing methods like ultrasonic testing for internal flaws or thermography for hot spots.
Generator Guardian: Keeping the Power Flowing
The generator is the heart of your power production. Consistent care keeps it beating strong.
- Consistent Inspection: Inspect the generator every three months. Look closely at the rotor blades (checking for cracks or debris), bearings (listening for unusual noises or feeling for wear), electrical connections (ensuring they are secure and free of corrosion), and overall structural integrity.
- Brushes and Bearings: Check generator brushes every six months, replacing them when they wear down to about half their original size (typically every 12-18 months). Generator bearings should be replaced immediately if any unusual noises, vibrations, or heat are present, or preventatively every 3-5 years.
- Maintain Cooling System: Inspect and clean the generator's cooling system periodically. Check coolant levels and top up with the recommended coolant. Clean cooling fins or heat sinks with compressed air or a soft brush to ensure efficient heat dissipation. Also, inspect hoses, air filters, and the thermostat, and lubricate any cooling fans.
Weathering the Storm: Protecting Your Investment
Your VAWT lives outdoors, constantly exposed to the elements. Smart weather protection safeguards its longevity.
- Protective Coatings: Apply high-quality, weather-resistant coatings to all exposed surfaces of the turbine and its support structure. These act as a shield against UV rays, moisture, and corrosion.
- Lightning Protection: Install a robust lightning protection system, including properly sized grounding rods and surge protectors for electrical components. This is crucial for preventing catastrophic damage during electrical storms.
- Drainage: Implement a robust drainage system around the turbine base to prevent water accumulation, which can lead to foundation erosion or structural damage.
- Emergency Plan: Develop an emergency plan for severe weather, including strong winds or heavy storms. This plan should detail how to safely shut down and secure the VAWT to minimize potential damage.
Smart Monitoring: Data Logging for Peak Performance
You can't manage what you don't measure. Data logging is your window into your VAWT's performance.
- Install a System: Equip your VAWT with a data logging system to continuously track key metrics like power output, wind speed, and wind direction.
- Set Up Alerts: Configure the system to send alerts if power output drops unexpectedly or if other irregularities are detected. This allows for prompt troubleshooting.
- Calibrate and Record: Regularly calibrate your monitoring equipment for accuracy. Keep detailed records of all performance data and maintenance activities; this helps identify trends and optimize future maintenance schedules.
Bringing in the Pros: Annual Professional Servicing
While much can be done by you, some tasks require specialized knowledge and equipment.
- Schedule Annually: Arrange for professional servicing at least once a year. Specialists will conduct comprehensive inspections of all components, including those difficult to access.
- Complex Tasks: They can perform complex maintenance tasks like blade balancing (crucial for vibration reduction), bearing replacements (ensuring correct parts and installation), and software/firmware updates for your control system.
- Records: Maintain detailed records of these professional visits, including reports and recommendations.
Troubleshooting Common VAWT Hiccups
Even with the best maintenance, issues can arise. Knowing how to troubleshoot common problems can save you time and money.
Excessive Noise or Vibrations
Unusual sounds or shaking are clear signs something is amiss.
- Check for Loose Components: The most common culprits are loose bolts in the rotor assembly, generator, or mounting structure. Tighten all connections using a torque wrench.
- Debris on Blades: Inspect blades for any accumulated debris (ice, leaves, dirt) that could cause imbalance. Clean them thoroughly.
- Bearing Issues: Refer back to the bearing maintenance section. If lubrication doesn't help, bearings may need replacement.
- Solutions: Consider vibration dampeners for persistent issues. In rare cases, repositioning the turbine may be necessary if it's consistently exposed to extreme turbulence.
Reduced Power Output
If your turbine isn't generating as much electricity as it used to, investigate these areas:
- Electrical Connections: Inspect all electrical connections from the turbine to the charge controller, inverter, and grid tie-in for looseness or corrosion. Clean or replace any corroded wiring.
- Inverter Check: Ensure the inverter is functioning correctly and displaying normal operating parameters. Fault codes can often pinpoint issues.
- Grounding: Verify that the system's grounding is intact and effective. Poor grounding can affect performance and safety.
- Safety First: Always disconnect power to the system before inspecting electrical components and use appropriate safety equipment. If you're unsure, call your licensed electrician.
- Wind Conditions: Double-check your data logs to ensure that the reduced output isn't simply due to a period of consistently lower wind speeds.
The Bottom Line: Is a VAWT Right for You?
Considering a VAWT for your home or business is a significant decision. Beyond the technicalities, it comes down to a clear cost-benefit analysis.
- Initial Investment vs. Long-Term Savings: VAWTs require an initial investment, but they can lead to substantial long-term energy savings. The typical payback period for a rooftop VAWT is 5-10 years, making them a financially sound decision over time.
- Energy Independence & Environmental Impact: Beyond the financial, consider the value of energy independence—reducing your reliance on the grid. Plus, you'll be contributing to a greener planet by reducing your carbon footprint.
- Expert Consultation: To make the most informed decision, consult with a renewable energy expert. They can help analyze your specific energy needs, site potential, and local incentives to provide a precise cost-benefit projection.
VAWT Myths Debunked & Quick Facts
Let's clear up a few common questions and misconceptions about VAWTs.
- TV or Radio Interference: VAWTs are unlikely to interfere with TV or radio signals. Any potential minor interference can typically be mitigated by ensuring adequate distance from antennas and using shielded cables for electrical wiring.
- Bird Safety: Modern VAWT designs often incorporate features like enclosed blades, slower rotation speeds, or visual deterrents to make them more bird-friendly than some traditional turbine designs.
- Flat Roof Suitability: Yes, flat roofs are often ideal for VAWT installation, provided the structural integrity can handle the turbine's weight and the dynamic forces of wind and vibration. Always get that structural engineer's assessment!
- Urban Performance: VAWTs truly shine in urban environments. Their ability to capture wind from any direction and perform well in turbulent wind patterns often gives them better performance than horizontal turbines in such conditions, even if the overall energy output may be more inconsistent due to fluctuating urban winds.
Empowering Your Energy Future: Next Steps
You've now got a comprehensive understanding of VAWT installation, maintenance, and safety. Armed with this knowledge, you're ready to take the next confident steps toward harnessing the wind's power.
Start by contacting a local structural engineer for that crucial roof assessment, and concurrently reach out to your local planning department and HOA to clarify all regulations. With a clear path forward, you can then focus on selecting the VAWT that best suits your needs, knowing you're prepared to install it safely and maintain it meticulously for a sustainable, energy-independent future.